- Posted on
- Comments 0
How to scan documents using Apple Notes on your iPhone
Do you have documents on paper that you’d like to make a digital copy of, either for yourself or for your family?
If you have an iPhone, scanning documents is quick and easy, if you follow these steps:
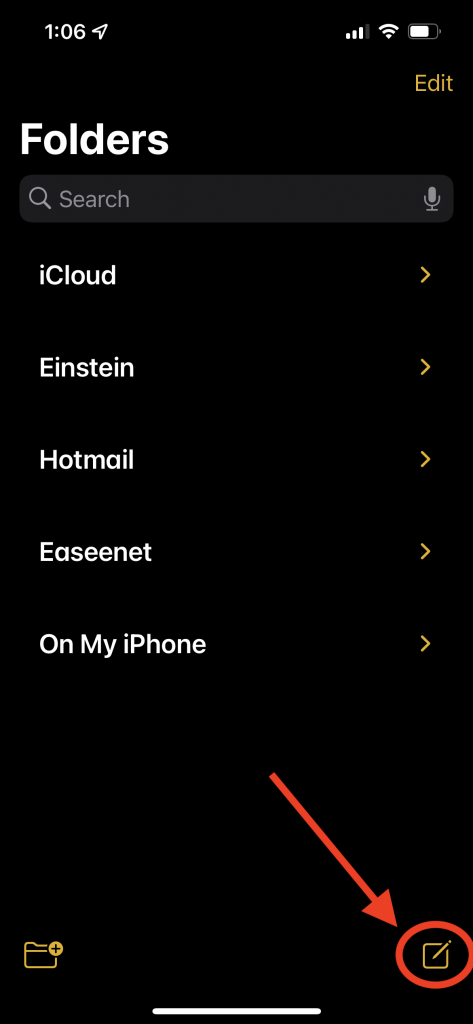
1. Open your Notes app (it’s a yellow and white icon on your home screen that looks like paper). Create a new note (or open an existing one) by clicking the “note” icon at the bottom right.

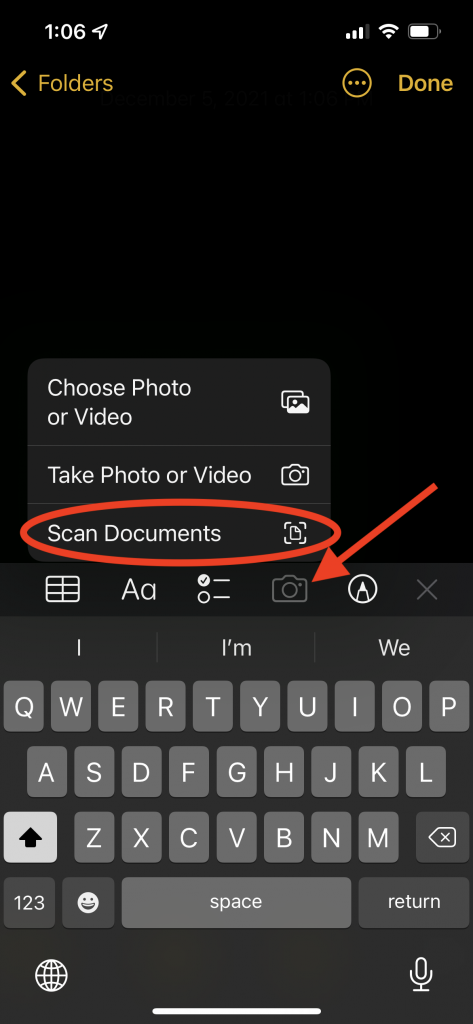
2. Click the camera icon and then click “Scan Documents” (note: if you don’t see the camera icon, you likely have a different keyboard installed– click the globe icon in the bottom left and you can select your standard keyboard and you will see the camera icon).

3. Your camera will open; position your camera over your document and you will see your document edges are automatically recognized, and the photo will usually automatically take (if it doesn’t, you can click the shutter button to take a picture). You can quickly and easily scan multiple pages this way (see video clip below- if you’re watching on a desktop, it may be easier to see in full-screen).
4. Once you’ve scanned all the pages you want to, you can easily change the name of the note if you’d like (see video clip below- if you’re watching on a desktop, it may be easier to see in full-screen).
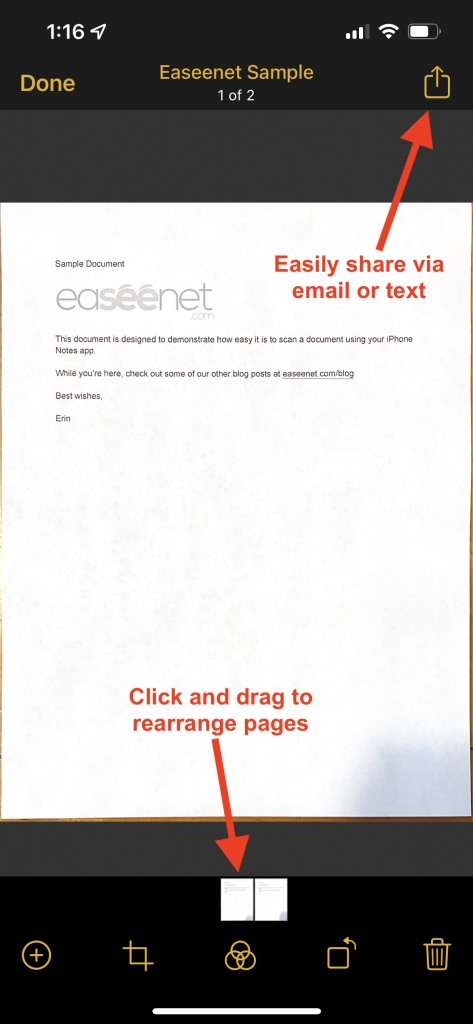
5. You can rearrange pages by pressing on one of the pages and drag it into a different order. You can also crop the scan, rotate, and make other modifications using the tools at the bottom. Once you’re happy with it, you can easily share via email or text, or just save to your iCloud files, by clicking the share button in the top right.

That’s it! Now you have your document scanned, and you can easily upload it to your Easeenet account or send it wherever you’d like.


